Iron Orchid Designs
Gloria Paint Inlay (IOD) Iron Orchid Designs– 12×16 Pad
Gloria Paint Inlay (IOD) Iron Orchid Designs– 12×16 Pad
Couldn't load pickup availability
Celebrate the beauty of the seasons with Gloria Paint Inlay by Iron Orchid Designs. Named for the Latin hymn of praise, Gloria is a richly layered collection that moves from the grandeur of baroque ornament and vintage engraving to the warmth of harvest abundance and the magic of a Victorian Christmas. Eight generous 12”×16” sheets give you a complete seasonal decorating vocabulary — equally at home on a holiday cabinet, an autumn tray, or a year-round statement piece.
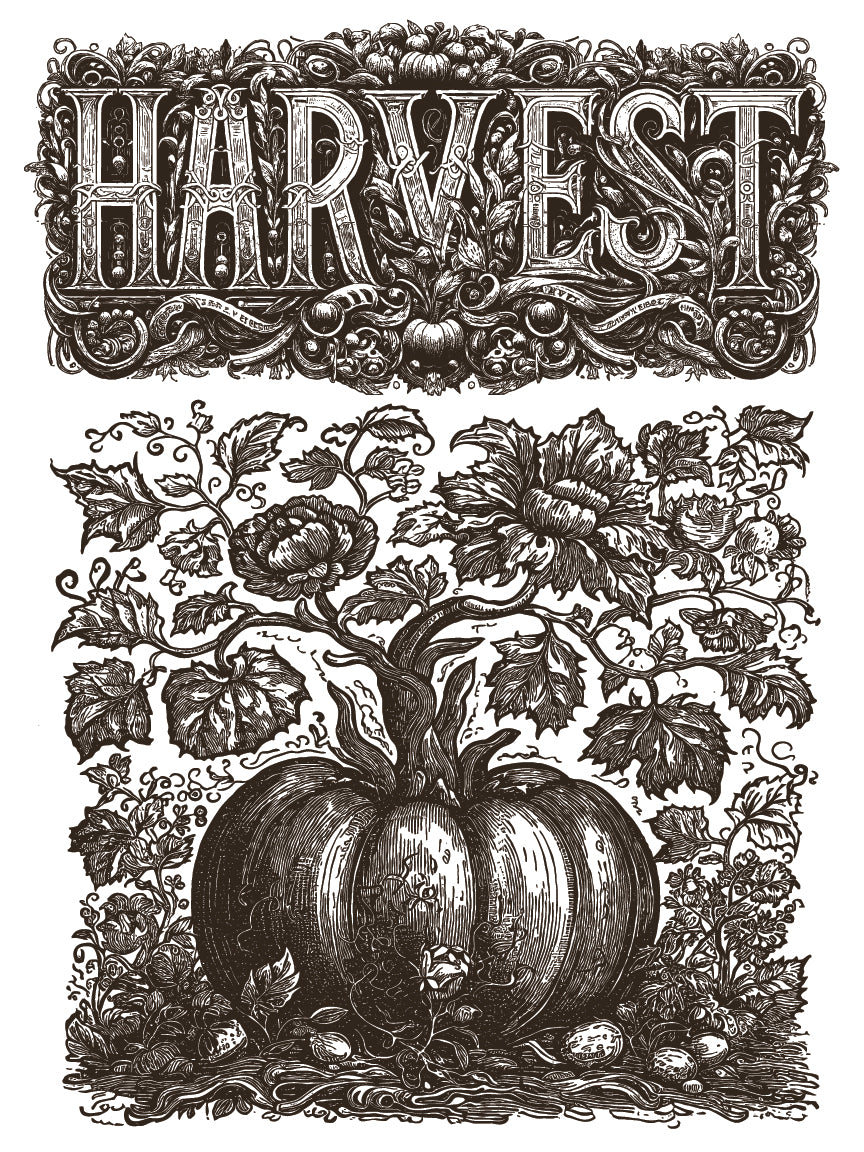
Picture a painted armoire paneled with a towering star-topped Christmas tree, its sides framed with holly-and-berry garlands and three stacked wreaths, the whole composition crowned with a “Merry Christmas” typographic banner. Or imagine a harvest sideboard anchored by a monumental pumpkin beneath a bold HARVEST title block, flanked by gourd clusters and oak-leaf vine borders. Gloria makes both visions — and everything in between — achievable.
What’s Included
- 8 sheets of paint inlay, each 12” × 16”
- Sheet 1 – Vintage Engravings & Baroque Ornament: “Gloria in Excelsis Deo” dove oval, olive branch sprigs (two sizes), open laurel wreath, large baroque cartouche with floral urn and acanthus scrolls, W. & C. Brown Seal Engravers trade card oval, and standing angel/herald figure
- Sheet 2 – Grand Baroque Pediment & Cherub: monumental baroque pediment with sea-horse finials, grotesque mask, shell cartouche, and acanthus scrollwork; holly-and-berry vertical sprig; wide horizontal cherub-and-acanthus scroll frieze with central putto playing violin
- Sheet 3 – Christmas Typography & Tree: “Merry Christmas” holly-and-berry typographic block; “We Wish You a Merry Christmas” typographic block; decorated Christmas tree with star topper and ornament balls; holly-and-ribbon banner swag
- Sheet 4 – Christmas Wreaths & Woodland Tree: large full holiday wreath with fruits, berries, and foliage; medium holly-and-pine wreath with satin bow; small buffalo-check ribbon wreath with pinecones and roses; tall slender woodland pine tree with scattered stars
- Sheet 5 – Harvest Pumpkins & Holly: large single pumpkin with oak-leaf vine border arc; cluster of five mixed gourds and pumpkins with trailing vines; holly-and-berry vertical sprig (repeat)
- Sheet 6 – Harvest Typography & Botanical Pumpkin: bold ornate “HARVEST” display title block with fruit and scroll decoration; large botanical pumpkin with climbing peony vine and dense foliage in a framed composition
- Sheet 7 – Additional Vintage & Seasonal Accents: additional engraving vignettes, botanical sprigs, and accent elements for fill and composition flexibility
- Sheet 8 – Mixed Seasonal Elements: additional Christmas, harvest, and baroque accent elements for layering and repeat compositions
- Palette: rich sepia/warm black line work on a white ground — pairs beautifully with cream, forest green, deep red, navy, warm grey, or any seasonal background color
About IOD Paint Inlays
IOD Paint Inlays are not transfers — they are a decal. When applied, artisanal paint is embedded into your surface, leaving an almost leather-like finish. The results are visually interesting, texturally complex, and may appear inherently distressed. The paint formula remains ‘active’ until sealed, allowing you to blend, soften, or add color before finishing.
How to Apply
- Plan the layout of your designs on your surface.
- Trim away the excess margins on each inlay sheet.
- On an appropriately prepared surface, apply a generous and even coat of mineral-based chalk type paint. Work in small sections no larger than 12”×16”, managing the drying window.
- While the paint is still wet, lay the inlay sheet design-side down (grids are printed on the back for easy identification). Keep it taut.
- Spritz lightly with an even mist of water. Using a smooth damp sponge or folded soft cloth, pat down with even light pressure to ensure the design makes good contact. Avoid excessive moving or dragging.
- Repeat steps 3–5 to complete your design, lining up sections as appropriate.
- Allow to dry thoroughly. Drying time varies by conditions; typically an hour or two is sufficient.
- When ready to remove, spritz the sheets evenly with water and allow 15–30 seconds to absorb. Starting at one corner, gently pull the paper up at a low angle. Re-spritz and wait if it does not release easily.
- Once dry, you may use water to blend out or soften the design, or add color — the pigment remains movable and active until sealed.
- Seal with at least two coats of a water-based sealer (50/50 sealer/water dilution spritzed on, then brush on your finish coat). A minimum of two coats is recommended.
Tips for Best Results
- Store at room temperature in a dry area until ready to use.
- Use a chalk-type paint that does not contain polymers for best results.
- Paints and coatings vary dramatically between manufacturers — always test on a scrap when uncertain.
- The inlay will appear a shade or two lighter before sealing, and will darken a bit when sealed. If doing a low-contrast color combination, test first.
- You can often get a beautifully faded impression with residual pigment on leftover sheets — sometimes even a third impression is possible!
US Patent 11,345,183. Made in China. All designs are property of Iron Orchid Designs®. All rights reserved.
Share